Encapsulation: The Do’s and Don’ts of Crawl Space Encapsulation

The Do’s and Don’ts of Crawl Space Encapsulation
What Is a Crawl Space?
The crawl space is an area beneath a house that provides access to the home’s foundation, plumbing, and electrical systems. Crawl spaces are usually designed to be just tall enough for a person to crawl through, hence the name. They are typically vented to allow for air circulation and moisture control.
Approximately 20-30% of homes in the US feature crawl spaces, which are critical areas prone to moisture intrusion, pest infestation, and poor indoor air quality if not properly managed. Proper encapsulation can effectively mitigate these common issues.
For crawl space encapsulation services in the greater Hampton Roads, VA / NC region, contact the BAY Crawl Space & Foundation Repair team.
What Is Crawl Space Encapsulation?
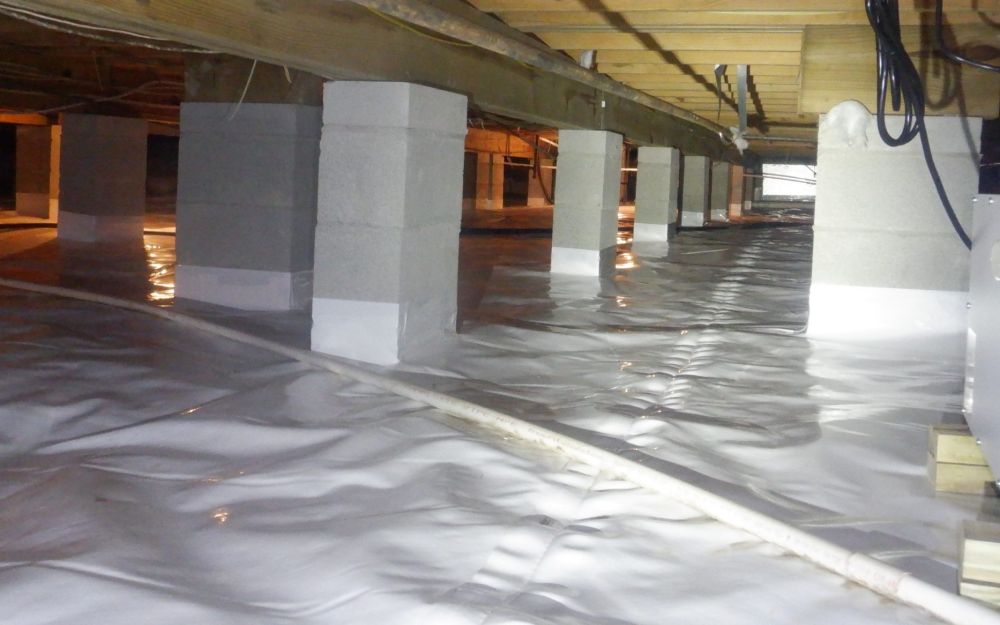
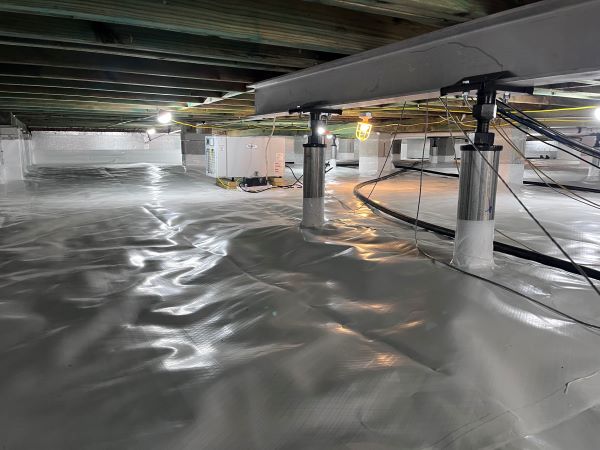
Crawl space encapsulation refers explicitly to adding a heavy-duty moisture barrier to the dirt floor of your crawl space, sealed foundation vents, insulated walls, and special crawl space dehumidifiers. It is most effective when you seal the space completely. That said, there are certain do’s and don’ts that homeowners should keep in mind when considering crawl space encapsulation.
Here’s our YouTube video 2015 with over 200,000 views that covers ‘Crawl Space Encapsulation 101: A Beginners Guide’.
What Not to Do When Encapsulating Your Crawl Space
Encapsulating a crawl space can greatly improve your home’s energy efficiency and indoor air quality. Here are some common mistakes to avoid:
Don’t Neglect Moisture Control
Modern encapsulation best practices recommend sealing crawl spaces completely and relying on dedicated dehumidifiers to maintain humidity levels below 60%. Ventilation in traditional terms is often eliminated in favor of a fully sealed, moisture-controlled environment to prevent mold growth and structural damage.
Choose Materials Designed for Crawl Spaces
Use thick, reinforced polyethylene vapor barriers (10-20 mil) for moisture control, closed-cell spray foam for insulation at rim joists and around penetrations, and rigid foam board insulation for walls. Proper installation and sealing of seams and edges are critical to long-term performance and repairability.
Don’t Skip Pest Control Measures
Crawl spaces can attract pests such as rodents and insects. When encapsulating your crawl space, seal any entrances for pests.
Don’t Overlook Any Moisture Issues
If your crawl space already has moisture issues, they won’t resolve themselves. Proper encapsulation addresses the underlying sources of moisture issues: outside humidity and moisture from the damp soil.
Don’t Encapsulate Without a Sealable Space
While encapsulating your crawl space will help keep it dry, it will not work if there are significant air gaps, allowing outside air to enter the space.
Don’t Forget to Install a Drainage System
Encapsulations do not prevent water entry or flooding under houses. Remember to install a water drainage system that directs the water away.
Avoid Fiberglass for Crawl Spaces
Fiberglass is not recommended for crawl space insulation because it absorbs moisture, loses insulating effectiveness, and can promote mold growth. Instead, use closed-cell spray foam or rigid foam insulation designed for damp environments.
Regular Monitoring and Maintenance
Maintaining a crawl space after encapsulation involves regular inspections of the vapor barrier for damage, checking and servicing dehumidifiers, and ensuring drainage systems function properly. Ongoing moisture monitoring is key to preserving the benefits of encapsulation long-term.
Don’t Ignore the Value of a Professional Installation
Crawl space encapsulation is a complex process that should be done by a professional with experience in the field. Attempting to encapsulate your crawl space alone can lead to costly mistakes and potential safety hazards. At BAY, we have dozens of unique methods that provide a genuinely superior installation.
What to Do When Encapsulating Your Crawl Space
Crawl space encapsulation can offer numerous benefits for your home. However, following the proper guidelines and techniques when encapsulating your crawl space is important to ensure optimal results.
Get the Area Ready
Before encapsulating the crawl space, make sure the crawl space is cleaned and any mold solutions is performed before the installation. This can help prevent any damage to the encapsulation material and ensure it lasts long. Conduct a safety inspection to ensure your combustion appliances aren’t emitting carbon monoxide that could back-draft into your living space.
Seal All Openings
Sealing all the openings in the crawl space is essential to prevent moisture from seeping in. This includes vents, pipes, floors, walls, siding, cracks, and other openings.
Choose the Right Materials
It’s essential to choose suitable materials for your crawl space encapsulation. Look for durable, moisture-resistant, and mold-resistant materials to ensure optimal results.
Install Proper Drainage
Proper drainage is essential for crawl space encapsulation. Installing a sump pump or a drainage system can help remove water intrusion and prevent water damage.
Work With a Crawl Space Encapsulation Professional
Earlier, we pointed out that DIY encapsulation may be wrong, especially for homeowners with zero training and experience in crawl space encapsulation. A professional brings valuable experience, ensuring the job is done correctly.
How Does Crawl Space Encapsulation Differ From Insulation?
Many homeowners don’t know the difference between crawl space encapsulation and insulation. Crawl space encapsulation works well when dealing with ground moisture and humid air. On the other hand, crawl space insulation is ideal for managing the floor’s temperature.
Crawl Space Encapsulation Cost Overview
Typical encapsulation projects range from $8,000 to $20,000 depending on crawl space size, condition, necessary repairs, and materials used. Costs may be higher for extensive water remediation or structural repairs prior to encapsulation.
What Are the Benefits of Crawl Space Encapsulation?
Once you’ve completed your home encapsulation project, there are certain clear benefits you can expect to enjoy. These include:
Protection From Mold
One of the issues associated with a damp crawl space is mold and mildew, which can cause specific health problems, including wheezing, coughing, stuffy nose, and itching. When you encapsulate your crawl space, you prevent moisture from building up in this space, which, in turn, prohibits mold growth.
Improved Air Quality
An unencapsulated crawl space can introduce mold, mildew, and other contaminants into your living space. Contaminated air makes your indoor space uncomfortable and could also harm your health. Once you seal the crawl space, you stop this problem.
Avoids Structural Damage
Moisture and pests in your crawl space will lead to structural damage over time because the vapor within the crawl space can rot your home’s wooden frames and flooring. Encapsulation keeps moisture and dangerous pests at bay.
Main Steps to Crawl Space Encapsulation
Crawl space encapsulation involves several essential steps to ensure the space remains dry and moisture-free.
Step 1: Inspection
The first step is to have a professional contractor inspect the crawl space thoroughly. The contractor will check for any issues such as water damage, mold growth, pest infestations, or structural damage. The inspection helps to identify the underlying issues and determine the best course of action.
Step 2: Cleaning and Preparation
An encapsulated crawl space needs to be cleaned and prepared. This includes removing debris, dirt, or obstructions and treating mold or mildew growth. The crawl space may also need to be leveled for uneven surfaces.
Step 3: Sealing
The next step is to seal the crawl space by covering the walls, floors, and other exposed surfaces. This barrier prevents moisture and humidity from entering the space. Solid, durable vent covers are recommended for foundation vents.
Step 4: Insulation
Insulation may be added once the crawl space is sealed to help regulate the temperature and improve energy efficiency. This is particularly important if the crawl space is below a living area. It helps to prevent energy loss through the floor.
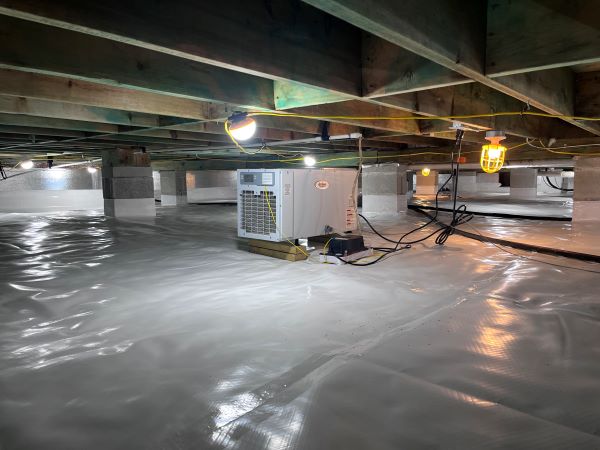
Step 5: Dehumidification
A dehumidifier may be installed to help control humidity levels and prevent moisture buildup in the crawl space. The dehumidifier helps to keep the crawl space dry. This is critical in preventing mold growth and preserving the structural integrity of the space.
Why Choose BAY Crawl Space for Crawl Space Encapsulation?
At BAY Crawl Space, we’re committed to providing top-quality crawlspace encapsulation services in VA and NC. Our team of experts has years of experience in crawl space repair and encapsulation. We use only the highest quality materials and equipment for our projects. We also offer competitive pricing and exceptional customer service to ensure complete satisfaction.
Encapsulate Your Crawl Space the Right Way
Of the home upgrades you can invest in today, crawl space encapsulation is one of the most important. It’s an easy project that can go a long way in preserving your home’s structural integrity and indoor air quality. Are you interested in reliable crawl space encapsulation services? Please contact us today.
Voted #1 Experts in Crawl Space Encapsulation
Our award-winning team of experts has hundreds of years of collective experience in crawl space and foundation repair. Here are a few reasons why our customers love us:
- Photos included with free inspections
- Flexible and customized options
- Discounts and financing available
- Excellent long-term warranties
- Great communication
#1 Rated Locally for Crawl Space Repairs
Our reviews show our commitment to caring for our customers over the years. We pride ourselves on giving great customer experiences & delivering excellent value. Our experience & efficiency allow us to do more, for less.