A beautiful, finished floor is key to a beautiful home. However, if there are issues with your subfloor, you will start to see damage on your new hardwood, tiles, or panels. This damage is not only unappealing from an aesthetic sense but can present a risk of tripping. It also reduces the value of your home when you try to sell as prospective buyers confuse the unsightly damage caused by subfloor material for foundation troubles.
If you suspect you have damage to your subfloor and want to repair or replace it, contact BAY Crawl Space. We can examine your subfloor for any damage and help resolve issues to ensure you always have a healthy and beautiful floor.
What Is a Subfloor?

Almost every floor has a subfloor. Subfloor consists of solid material beneath your flooring materials, be they a wood floor, tile flooring, laminate flooring, carpeting, linoleum, or other types of material. Subfloor material is usually comprised of plywood or oriented strand board (OSB). Areas below grade may consider the concrete foundation a subfloor, though OSB or plywood subfloors are often installed over the concrete with sleepers or ground-level floor joists.
What Are the Different Types of Subflooring?
Many different types of materials can be used to create a subfloor. The most common include plywood, concrete, OSB, and particle board.
Plywood
Plywood subfloors are the most common form of subfloor. It has been widely used since the 1950s and is a cost-effective and stable engineered wood solution. Plywood is often secured using a tongue-and-groove system, which increases its stability. Plywood flooring consists of a single piece of wood for each section of the subfloor laid to form a base for the finished floor covering.
Concrete
Concrete subfloors are generally found only in areas below grade, where the foundation flooring is considered the subfloor. Even in such sites, OSB or plywood subfloors are installed using ground-level floor joists called sleepers, and the subfloor is placed on top of the joist.
Oriented Strand Board (OSB)
OSB is similar to plywood, installs similarly, and offers alike in structural integrity and performance. Its advantage is that it can cost less than plywood and provides a more reliably even surface than plywood, which may still have bumps and knots on the sheet’s surface. OSB is also known as a water board. It just hit the market in the 1960s.
Particle Board
Particle board is also known as chipboard. It is one of the oldest engineered wood products still in use today. Particle board is made from resin and wood chips, which are pressed together. For the most part, however, particle board subfloors are only found in old houses because they can decay and rot more easily than plywood, which has largely replaced it. If you need to remove subfloors made from particle board, they will likely be replaced with a new subfloor made from plywood or OSB.
When Should You Replace Subfloors?
There are many signs that your damaged subfloor should be replaced with a new subfloor. These include squeaks and other noises, cupping or warping, cracked or popped tiles, sagging or unevenness, the smell of mold or mildew, or bubbling tile.
Squeaks or Noises
Not every creak or squeak signifies that a new subfloor is needed. Many floors have a little squeak, and it often goes unnoticed. Squeaking usually happens because the wood in the subfloor rubs against a nail. Ideally, the nails hold the subfloor to the top of the joists. When the floor starts to warp or twist, the nails can become loose, and squeaking becomes more pronounced. If you hear loud squeaks every time you put weight down, it might be time to give the subfloor some attention.
Cupping or Warping
Warping and cupping are tell-tale signs of a weak subfloor and may indicate water damage. Cupping means your floorboards have curls along the board’s length, and it’s caused by moisture. Warping means that the floorboards twist out of shape like an “S.” It is also often caused by water. Moisture can come from above or below the flooring, but it presents serious issues to be addressed.
Cracked or Popped Tiles
When you step on a tile floor and hear cracking or popping, it’s a definite sign that something is off. Properly adhered tiling should last for decades before it works loose. If you can easily lift a tile and it is entirely covered by dry thin-set or construction adhesive, the issue is definitely with the subfloor.
Moisture may be suspect, but the wrong subfloor material is often just as likely a culprit. Any tile project should see a cement board over the subfloor, which provides strength, eliminates bounce, and helps the tile to adhere properly.
Sagging or Uneven Floor
Sagging sections in your flooring are an immediate, telltale sign that you have major issues with the subfloor. Flooring problems of this nature are almost always caused by moisture, but they can also indicate poor installation. During subfloor installation, end-to-end joints should meet on top of the joist. If the joint is off by any amount, foot traffic will cause sinking over time.
Mold or Mildew Smells
A smell of mold or mildew is a definite sign that you have moisture damage. Mold and mildew can eat away at your wooden subfloor just as the moisture that caused it can make the subfloor swell, warp, and twist. If you have water damage in your subfloor, it will only get worse, and it becomes vital to quickly investigate the breadth of damage so you can address it before it becomes a critical issue.
Bubbling Tile
Bubbling is an issue with linoleum tile or linoleum flooring often found on kitchen floors. Vinyl plank flooring may also experience some bubbling on occasion. Bubbling vinyl or linoleum is not always a reason to worry, but if it’s caused by moisture or water damage under the floor, it can present an issue. If you see a lot of bubbling throughout the floor, you may need to investigate to ensure you do not have a damaged subfloor.
How to Remove a Plywood Subfloor
Removing and replacing plywood subfloors as DIY projects is part of many renovations and home improvement projects. It is also well within the realm of possibility, but DIYers can quickly find themselves in over their heads if they are not careful.
If you notice any of the symptoms discussed above: squeaking, bubbling, uneven floors, musty smells, or the like, it is time to evaluate the issues. The steps to remove a plywood subfloor include assessing the damage, determining the root cause, gathering tools, removing the flooring, disposing of the damaged floor, and installing a new floor.
If you need a new subfloor or are interested in having the pros assess potential damage to your floor, BAY Crawl Space is ready to help. Call us at 757-301-5088 or contact us online for a free estimate today.
Assess the Damage (If Any)
The best, easiest way to assess subfloor damage is to look at it from below, if possible. It could mean heading to your basement or crawlspace with a flashlight and moving some insulation, cutting out the drywall in the ceiling, or otherwise checking it out without tearing out the floor.
Sometimes, however, this may be challenging. You may actually have to remove at least part of the finished floor to check for damage. You might have loose tiles that could easily pull up without damaging the rest of the tiles around them. If so, this may be the easiest prospect.
In some cases, you may simply need to tear up the floor. If you are not comfortable tackling these projects yourself, call in a professional. If you can inspect your subfloor and do not see moisture issues or other damage, the problem could be deeper, like foundation issues or problems with the floor joists. While experienced DIYers may be able to address such cases, they are usually best handled by trained professionals.
Determine the Cause of the Subfloor Damage
Most of the time, subfloor damage results from water and moisture issues or damage from pests like termites or carpenter ants. Pest infestations can be some of the most insidious and invisible causes of structural damage to a home. Many people never realize they have termites until it is too late. Carpenter ants, conversely, can usually be seen in the house, and seeing one is an indicator of a potential problem.
A pest infestation can destroy not just a subfloor but also your home’s structure. Termites and carpenter ants can chew through support beams and weaken your walls and roof. Before repairing subfloors from pest infestation, it is a good idea to have the pests exterminated first.
Gather the Right Tools
An old saying goes, “The right tool for the right job.” When replacing a subfloor, you need many tools, including a scraper, chisel, hammer, drills, circular saw, demolition claws, chalk box, speed square, flat pry bar, putty knife, reciprocating saw, and even potentially a sledgehammer. You will also need fasteners like nails, screws, braces, and brackets. Of course, you will need new plywood to replace the damaged floor.
Remove Flooring
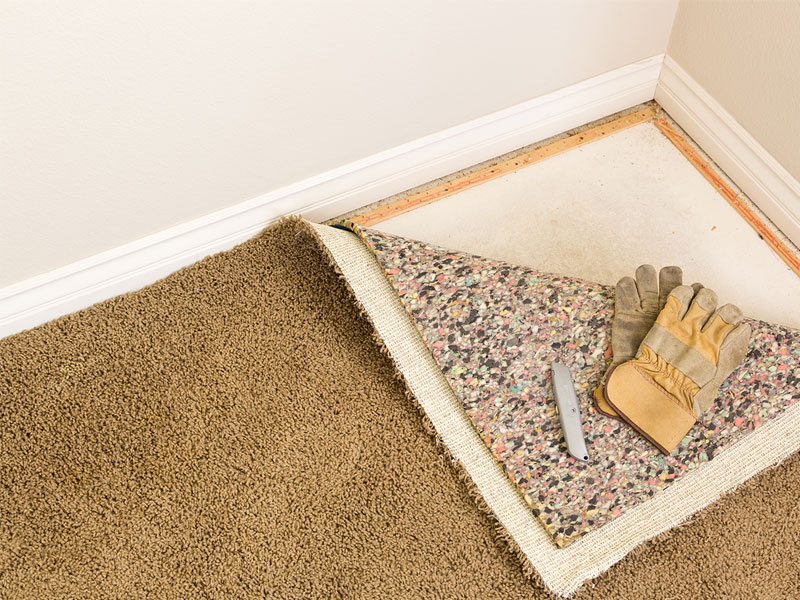
The next step is to tear up the old top flooring. If your top flooring is carpeting, start around the outer perimeter and pull it up from the edges inward. You will also need to use a scraper and pry to remove the underlayment and nails holding the carpet down. Only areas you intend to replace need to be removed. If the floor is tile or linoleum, use a blade or chisel to score around the edges and a pry bar to loosen and pull up any areas you wish to replace.
You may need to remove any baseboards to access the room’s edges. If you do, save the baseboards to re-install them later.
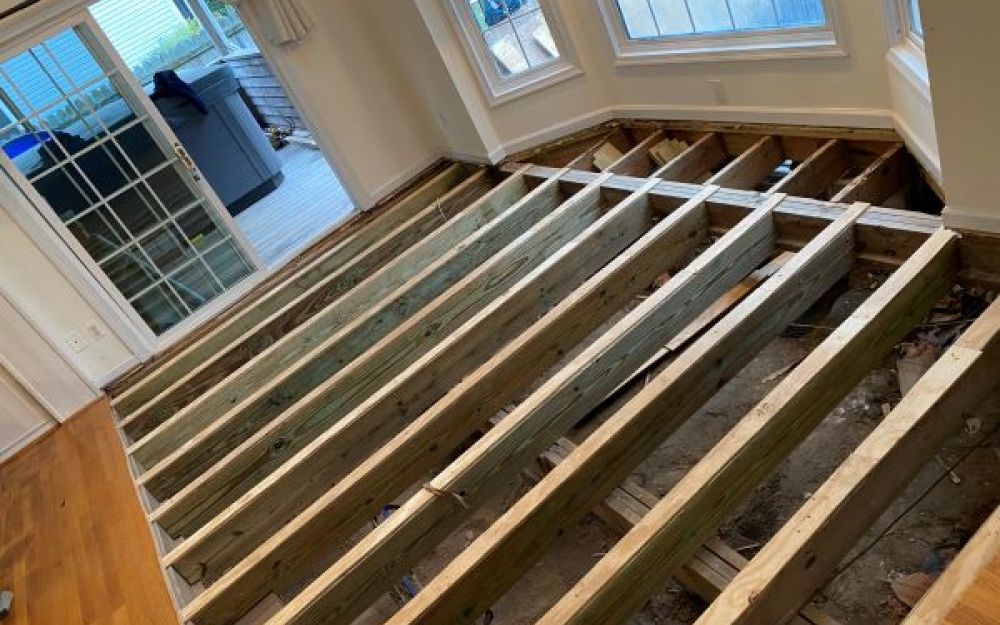
Pull Out the Damaged Subfloor
Check out the places where the subfloor is damaged. Cut around it with a circular saw or reciprocating saw and pull out the damaged areas. When you replace the damaged floor, you will need to sit the ends on the joists. This means you should cut enough space around the joists on both sides. Be sure to get all of the damaged floor, or the damage can spread again. Keep the cuts as square as possible to the joists to save a lot of headaches and stress.
Install the New Subfloor
Next, measure and mark your new plywood to match the specs of the sections you cut and removed. Be as exact as possible, and remember the rule: measure twice, cut once. Use your circular saw to cut the plywood to shape. A reciprocating saw or jigsaw may be of use for tight corners or curves. Special blocking is required at the ends of the subfloor when tongue and groove plywood isn’t used.
Place the sheet down and cut down or file any stray edges that do not fit flush. You’ll need to apply caulk to the jobs of all floor joists before laying the new subfloor. After this, drive ring-shank nails through every joist, every 6” to 8”. You must be careful when securing your new subfloor. Cutting corners or taking shortcuts here will result in reduced structural integrity, and you may find yourself doing this all over again all too soon.
Installation of new subfloor is highly recommended to be performed by professionals because there are many nuanced steps that require special tools and skills.
We’ll Help Resolve Your Subfloor Issues Immediately
If you are worried about additional damage to your home or are concerned about tackling such a complex DIY project, the experts at BAY Crawl Space may be able to help. We can troubleshoot the source of your subfloor damage, handle any repairs, or even install an entirely new subfloor so you will always have peace of mind knowing your issues are repaired correctly. Call us at 757-301-5088 or use our online contact form to schedule an appointment today.